Ruff 1600 century |
2005
I begun once again to try to make a ruff. The first try didn´t come out
well. Somehow I
became a little bit moore intelligent about this. I didnt make the same misstakes
again. Use a steardy lace or fabric. Don´t make the ruff pleetings longer
than ca 10 cm ("4"), now you can be sure that the pleetings not will
sort of hang down, and it will look like a very sad ruff. If you want to add a
sturdy edge use some fishline at the edge by sewing it to the lace. The collar
around the neck can be made from anything that will feele nice next to your skin. |
Method
1 Fishline sewed to the edge of the lace. The
collar messures the width around your neck+ 3 cm, and ca 3 cm broad. The
lace is about 3 meters long. ( Unfortunately I never got the exakt lenght.) |
| Something
like this looks the schedule. |
 | The
material for the collar wich can be made of any piece of fabric you have. |
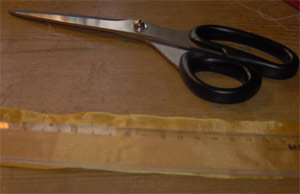
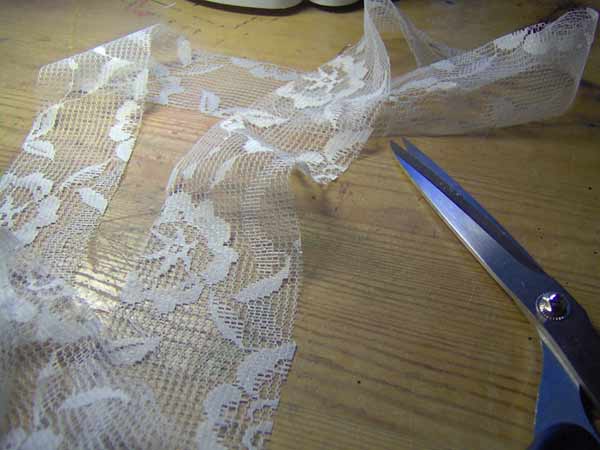 | I
used a large piece of lace and did cut out long ribbons of lace. |
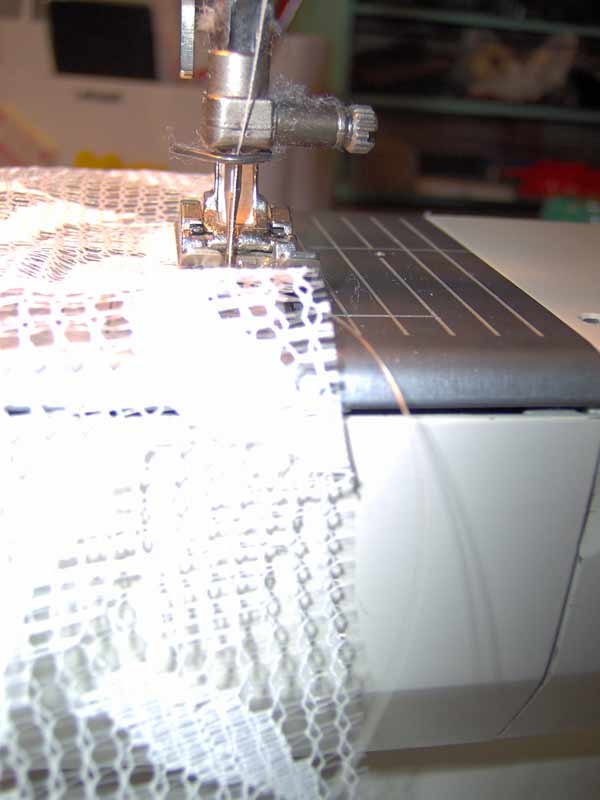 | At
one of the longsides I sewed a fishline to the edge. This edge will be the outer
side on the ruff. |
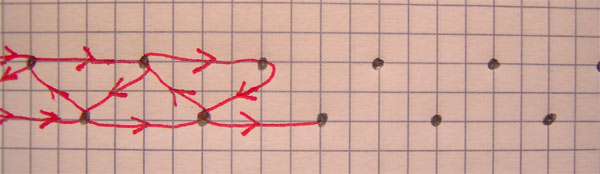
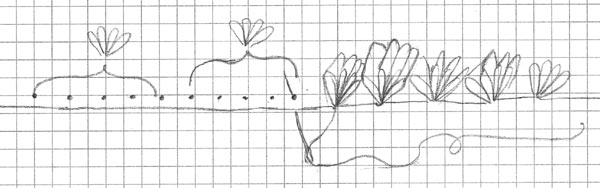
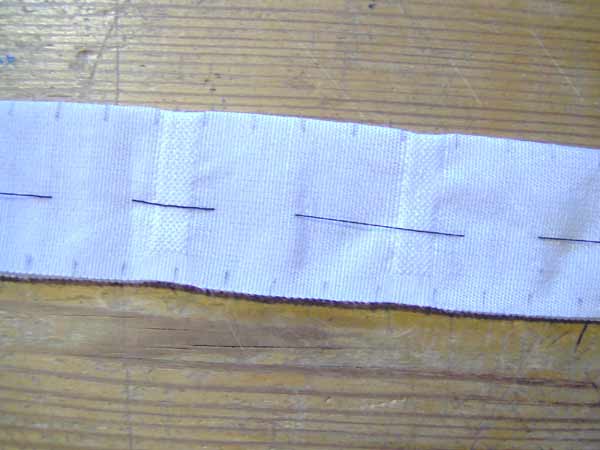 | Make
small marks on the collar, in
V-formation (not opposite to each other) at the opposit edges. Use ca
1 cm between the marks. |
 | Start
to stich the lace edge to the collar by stiching about 3 times thru the lace edge
into the collar. Stich the lace in 8 formations as the schedule
above or the picture here shows. |
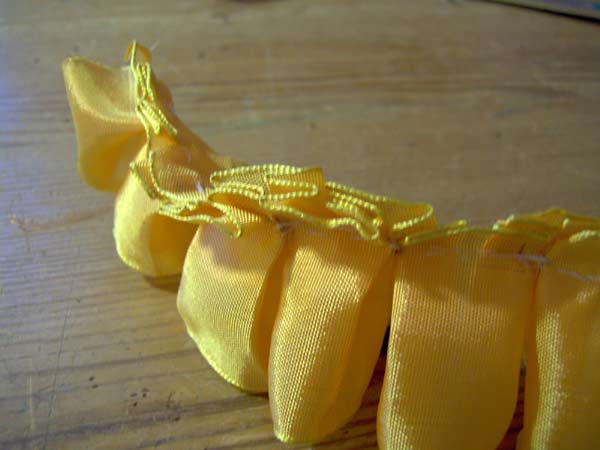
 | After
a short while you will be able to see some sort of 8 formations
and a ruff looking thing in your lap. |
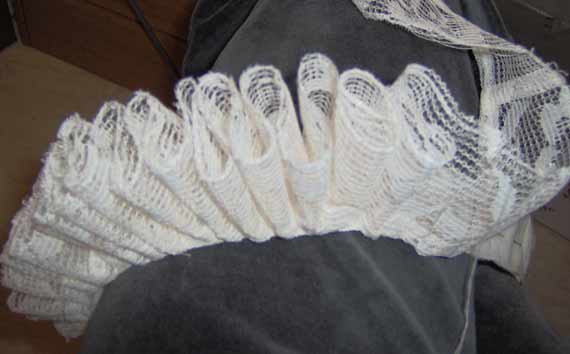
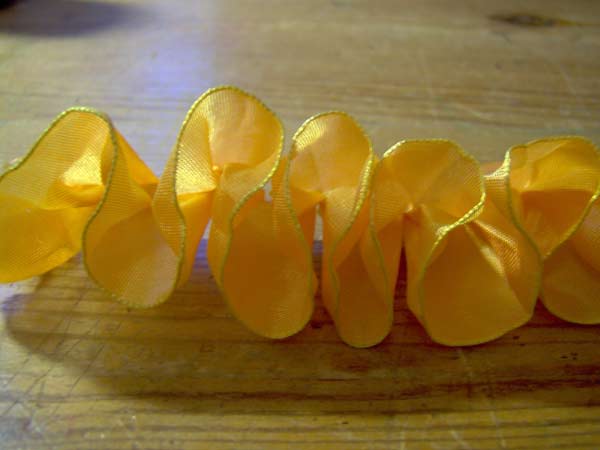
  | Well
this is what it looks like when it is ready. |
| |
Method
2 lace in soft pleetings. This
is a moore complicated way of doing a ruff, the pleetings will look a little bit
softer. Useful for ex arm flounce fabric flounce and so on. Messure
around your neck+3 cm and 3 cm broad. Make this 2 times. The
lace abotut 3 m long. | |
 | Start
to mark out every 2 cm. Do this about 1 cm in from the edge. |
 | Put
the needle up at the first mark, then pick up a few threads at each mark so that
in the end you will have 5 marks on the needle. Then sew it together and you will
get 4 pleetings. Every " bunch" of marks will later become pleetings. |
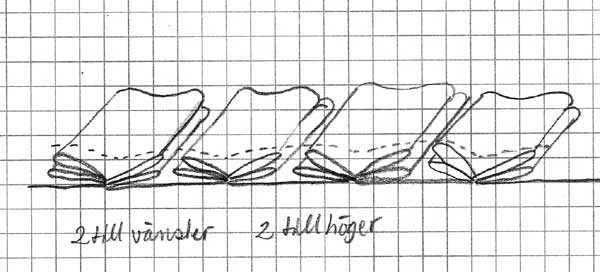 | Now
take two of the pleetings to the left and two to the right, stich them to the
edge by hand along the seam you allready hav. |
 | And
now you will be able to start seeing some kind of ruff pleetings. |
 | When
you start form the ruff 8:ths they will fall in place automaticly
by them selves. |